AutoGraver Model 20 And Model 8/6 Cutter Installation
AutoGraver model 20 and model 8/6 use identical cutters and identical cutter collets. However, the procedure to install the cutter differs slightly. Select your model's tutorial below for step-by-step guidance.
Model 8/6 introduced August 1, 2023 - top half of page
Model 20 sold prior to July 31, 2023 - bottom half of page - Scroll Down
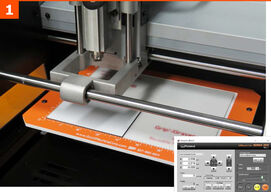
Model 8/6 Cutter Installation Tutorial
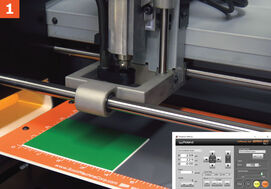
Raise the engraver head to the top of its travel via the arrow keys in the VPanel computer window.
Move the head over your workpiece.
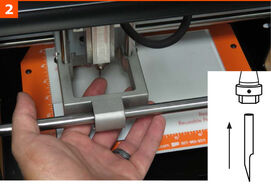
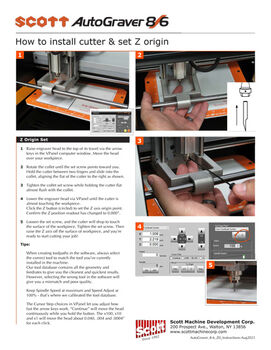
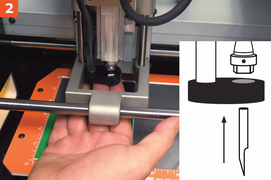
Model 8/6 - Rotate
Rotate the collet until the set screw points toward you.
Hold the cutter between two fingers and slide it into the collet, aligning the flat edge of the cutter to the right as shown.
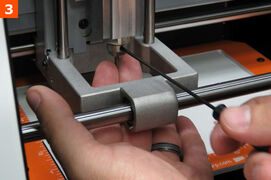
Model 8/6 - Tighten
Tighten the collet set the screw while holding the cutter flat, almost flush with the collet.
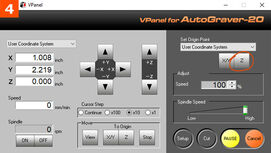
Model 8/6 - Lower
Lower the engraver head via the VPanel until the cutter is almost touching the workpiece.
Click the Z button (circled) to set the Z axis origin point.
Confirm that the Z position readout has changed to 0.000”.
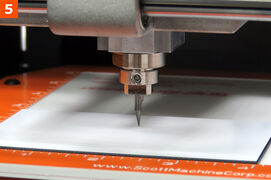
Model 8/6 - Loosen, Then TIghten
Loosen the set screw, and the cutter will drop to touch the surface of the workpiece.
Tighten the set screw.
Now raise the Z axis off the surface of the workpiece, and you’re ready to start cutting your job!
For Maximum Performance...
Follow these simple tips:
When creating toolpaths in the software, always select the correct tool to match the tool you’ve currently installed in the machine. Our tool database contains all the geometry and feed rates to give you the cleanest and quickest results. Remember that selecting the wrong tool in the software will give you a mismatch and poor quality.
Keep the Spindle Speed at maximum and Speed Adjust at 100% - that’s where we calibrated the tool database.
The Cursor Step choices in the VPanel let you adjust how fast the arrow keys work. “Continue” will move the head steadily while you hold the button. The x100, x10 and x1 will move the head about 0.040", .004" and .0004” respectively, for each click.
Click to download the illustrated instruction sheet to install and change engraving cutters.
Model 20 Cutter Installation Tutorial
Model 20 was sold until July 31, 2023.
Raise the engraver head to the top of its travel path via the arrow keys in the VPanel computer window.
Then move the head over your workpiece.
Model 20 - Rotate
Rotate the collet until the set screw points toward you.
Now hold the cutter between two fingers and slide it into the collet.
Be sure to align the flat of the cutter to the right as shown.
Model 20 - Tighten
Tighten the collet set screw with a simple hex driver, while holding the cutter almost flush with the bottom of the vacuum foot.
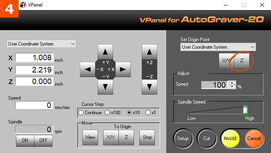
Model 20 - Lower
Lower the engraver head until the vacuum foot is approximately 1/8” from touching the workpiece.
Next, click the Z button (circled) to set the Z axis origin point.
Confirm that the Z position readout has changed to 0.000”.
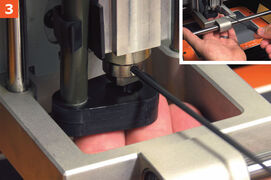
Model 20 - Loosen, Then Tighten
Loosen the set screw, and the cutter will drop to touch the surface of the workpiece.
To finish, tighten the set screw.
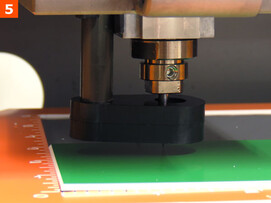
Then raise the Z axis off the surface of the workpiece, and you’re ready to start cutting your job!
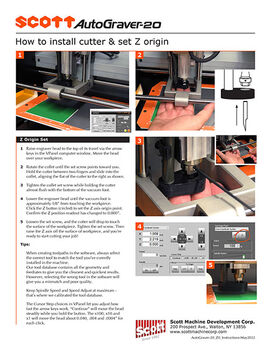
For Maximum Performance...
Follow these simple tips:
When creating toolpaths in the software, always select the correct tool to match the tool you’ve currently installed in the machine. Our tool database contains all the geometry and feed rates to give you the cleanest and quickest results. Remember that selecting the wrong tool in the software will give you a mismatch and poor quality.
Keep the Spindle Speed at maximum and Speed Adjust at 100% - that’s where we calibrated the tool database.
The Cursor Step choices in the VPanel let you adjust how fast the arrow keys work. “Continue” will move the head steadily while you hold the button. The x100, x10 and x1 will move the head about 0.040", .004" and .0004” respectively, for each click.
See our
SHARPEN YOUR ENGRAVING SKILLS
It takes just a few moments to properly install your Scott AutoGraver-20® engraving cutter, for hours and hours of successful tag- and sign-making. Remember, too, that our Scott Machine professionals are just a phone call away, to assist and guide you. For more than 50 years, our American-made products have raised the bar and set the standard.
Scroll to Top


